Two-column pages often confuse OCR tools. Instead of reading the entire left column and then the entire right column, an OCR engine may join lines that happen to be at the same height.
We will use this two-column article image for both methods:
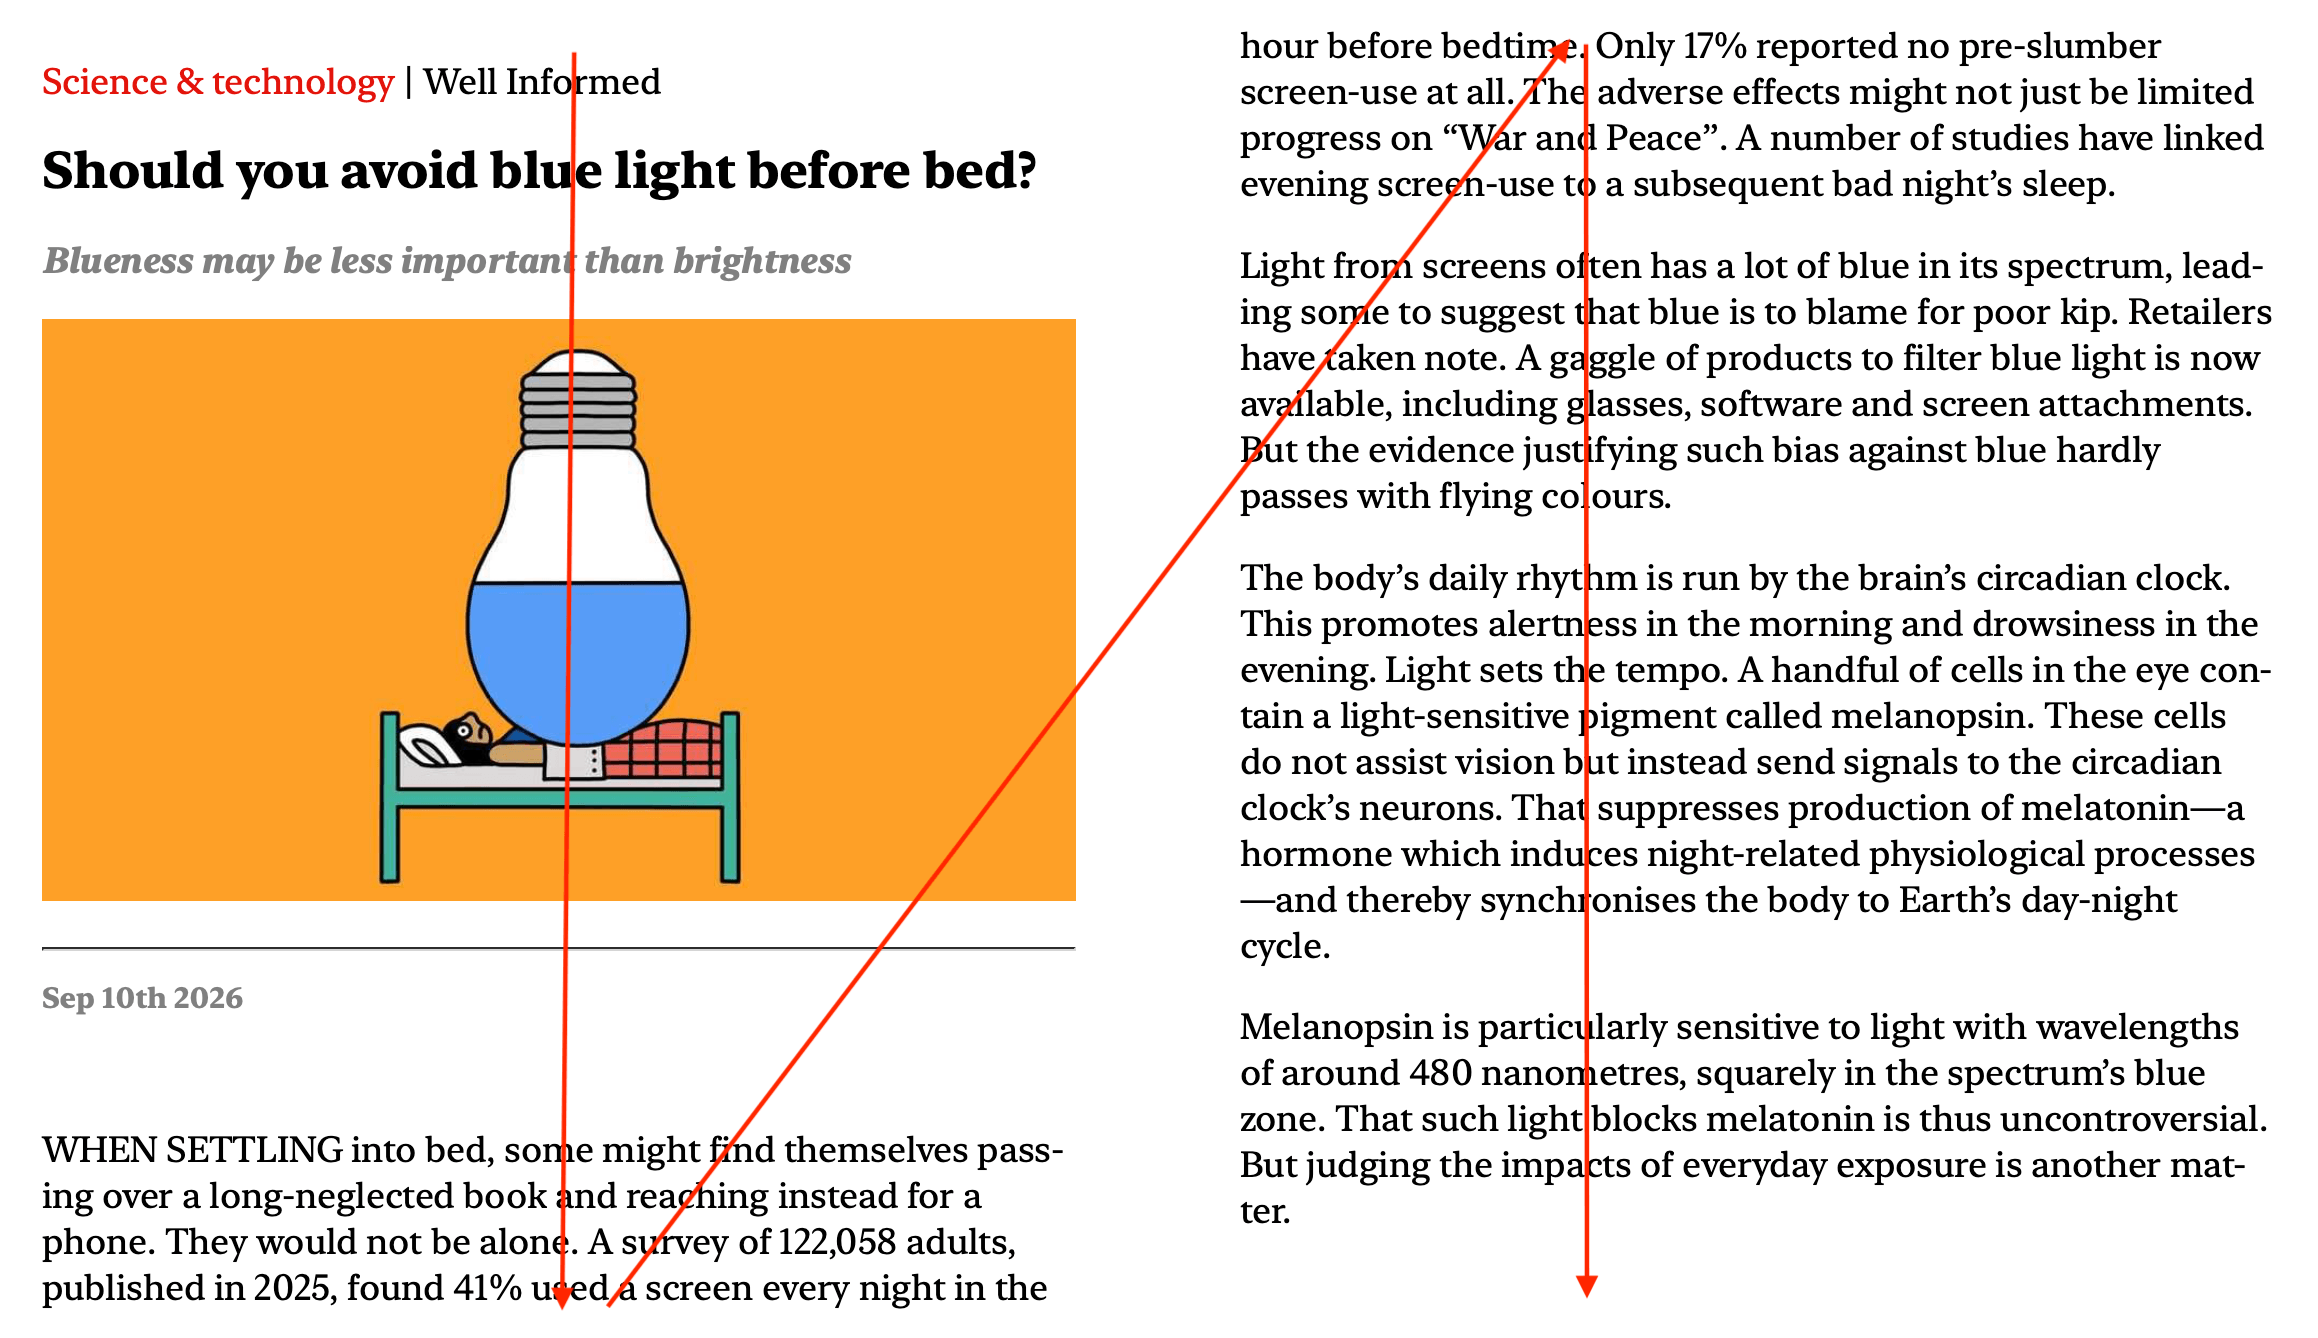
The correct reading order is to read the left column first, then continue from the top of the right column. Here are two practical ways to do that.
Method 1: Crop Each Column Before OCR
This is the most reliable method when exact reading order matters. It works well for contracts, research papers, legal documents, and other pages with two clearly separated columns.
Step 1: Crop the left column
Open the page in the Image Cropper. Select the left text column from top to bottom, leaving a small margin around the text. Do not include any part of the right column.
Save the crop as page-01-left.png.
Step 2: Crop the right column
Return to the original page and select the right text column in the same way. Save it as page-01-right.png.
Step 3: Extract and combine the text
Open Local Image to Text and process page-01-left.png first. Copy the result into your document, then process page-01-right.png and paste that result below it.
Result with the example image
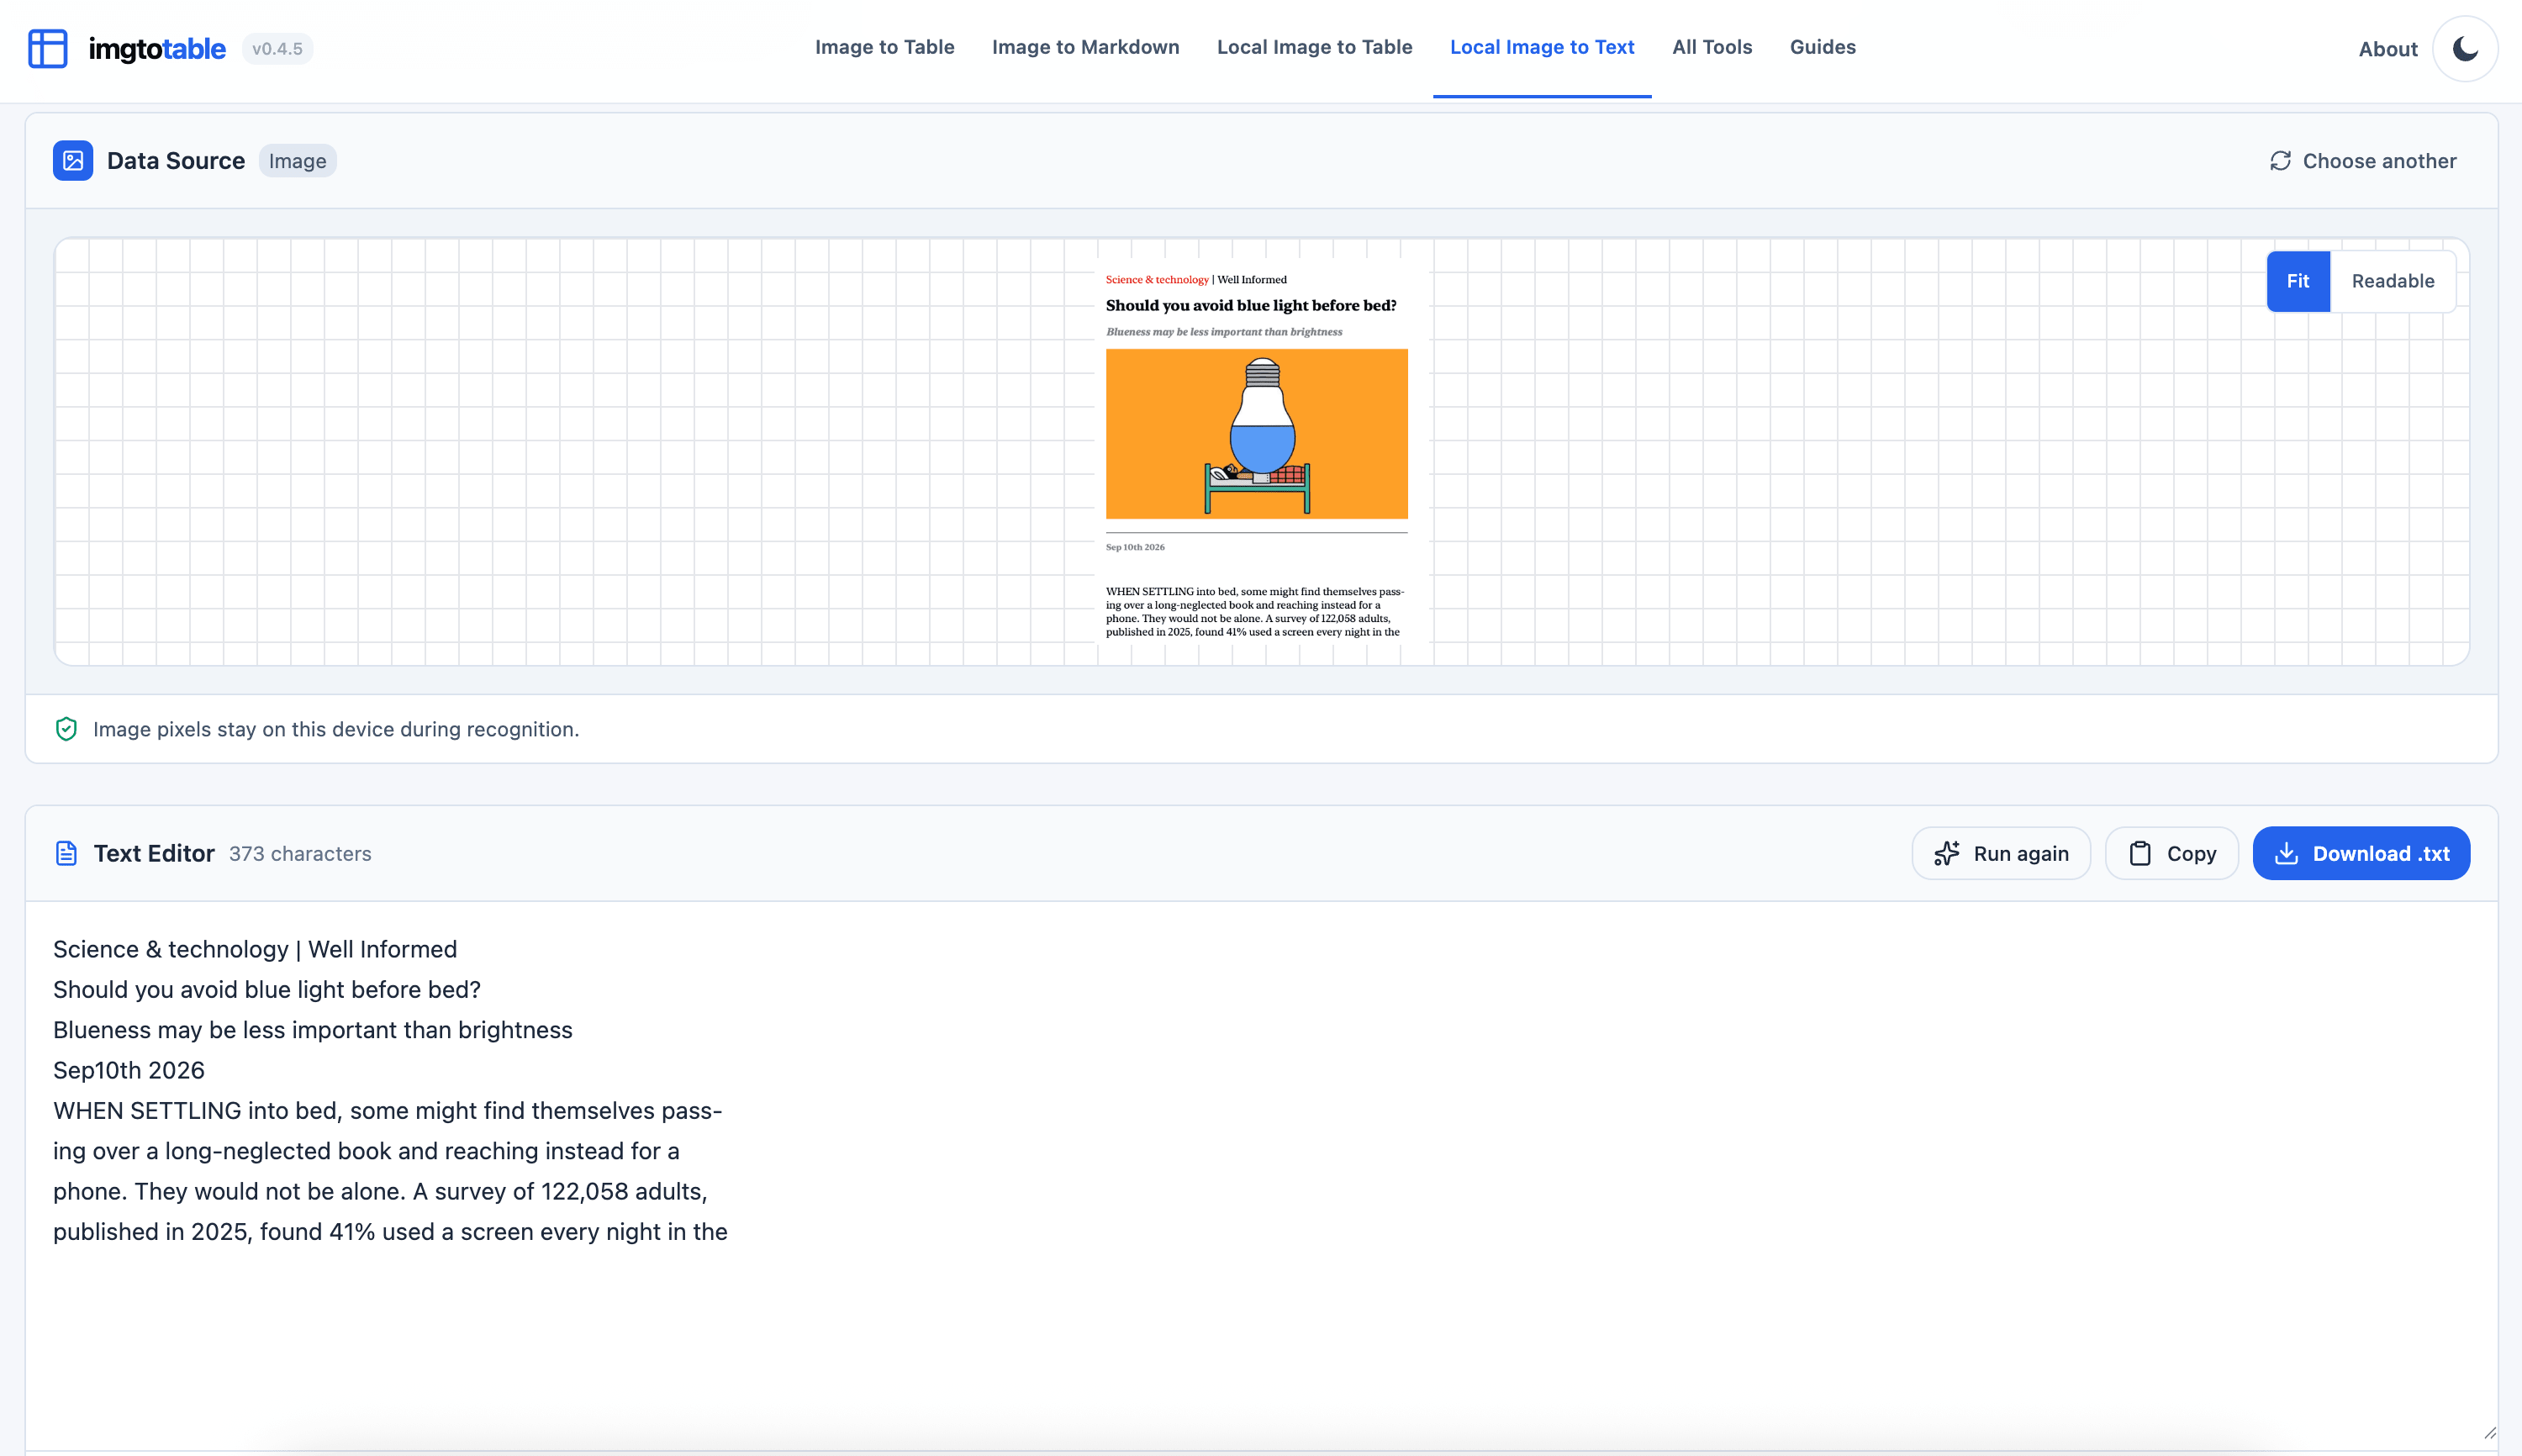
The screenshot shows the result after processing only the left column. The title, subtitle, date, and body text remain in their visual order, and no text from the right column is mixed into the output. Local OCR follows the printed lines closely, so a line-break hyphen such as pass- followed by ing may remain; join it as passing during the final edit.
Method 2: Convert the Full Page to Markdown
Use this method when you want to process the full page in one pass or when the layout includes headings, lists, captions, or other elements you want to preserve. Image to Markdown uses a server-side vision model to interpret the page layout and return structured Markdown.
Step 1: Upload the complete page
Upload the uncropped two-column image. Keep the page upright and make sure the central gutter is visible. A clear gutter helps the model distinguish the two text blocks.
Step 2: Check the column transition
In the Markdown result, find the final sentence from the left column and the first sentence from the right column. Read those two sentences together to confirm that the text moves down the left column before continuing at the top of the right column.
Step 3: Correct layout-specific errors
Check headings, figure captions, footnotes, and words split at a line or column break. These elements are the most likely to appear in the wrong position even when the main paragraphs are ordered correctly.
Result with the example image
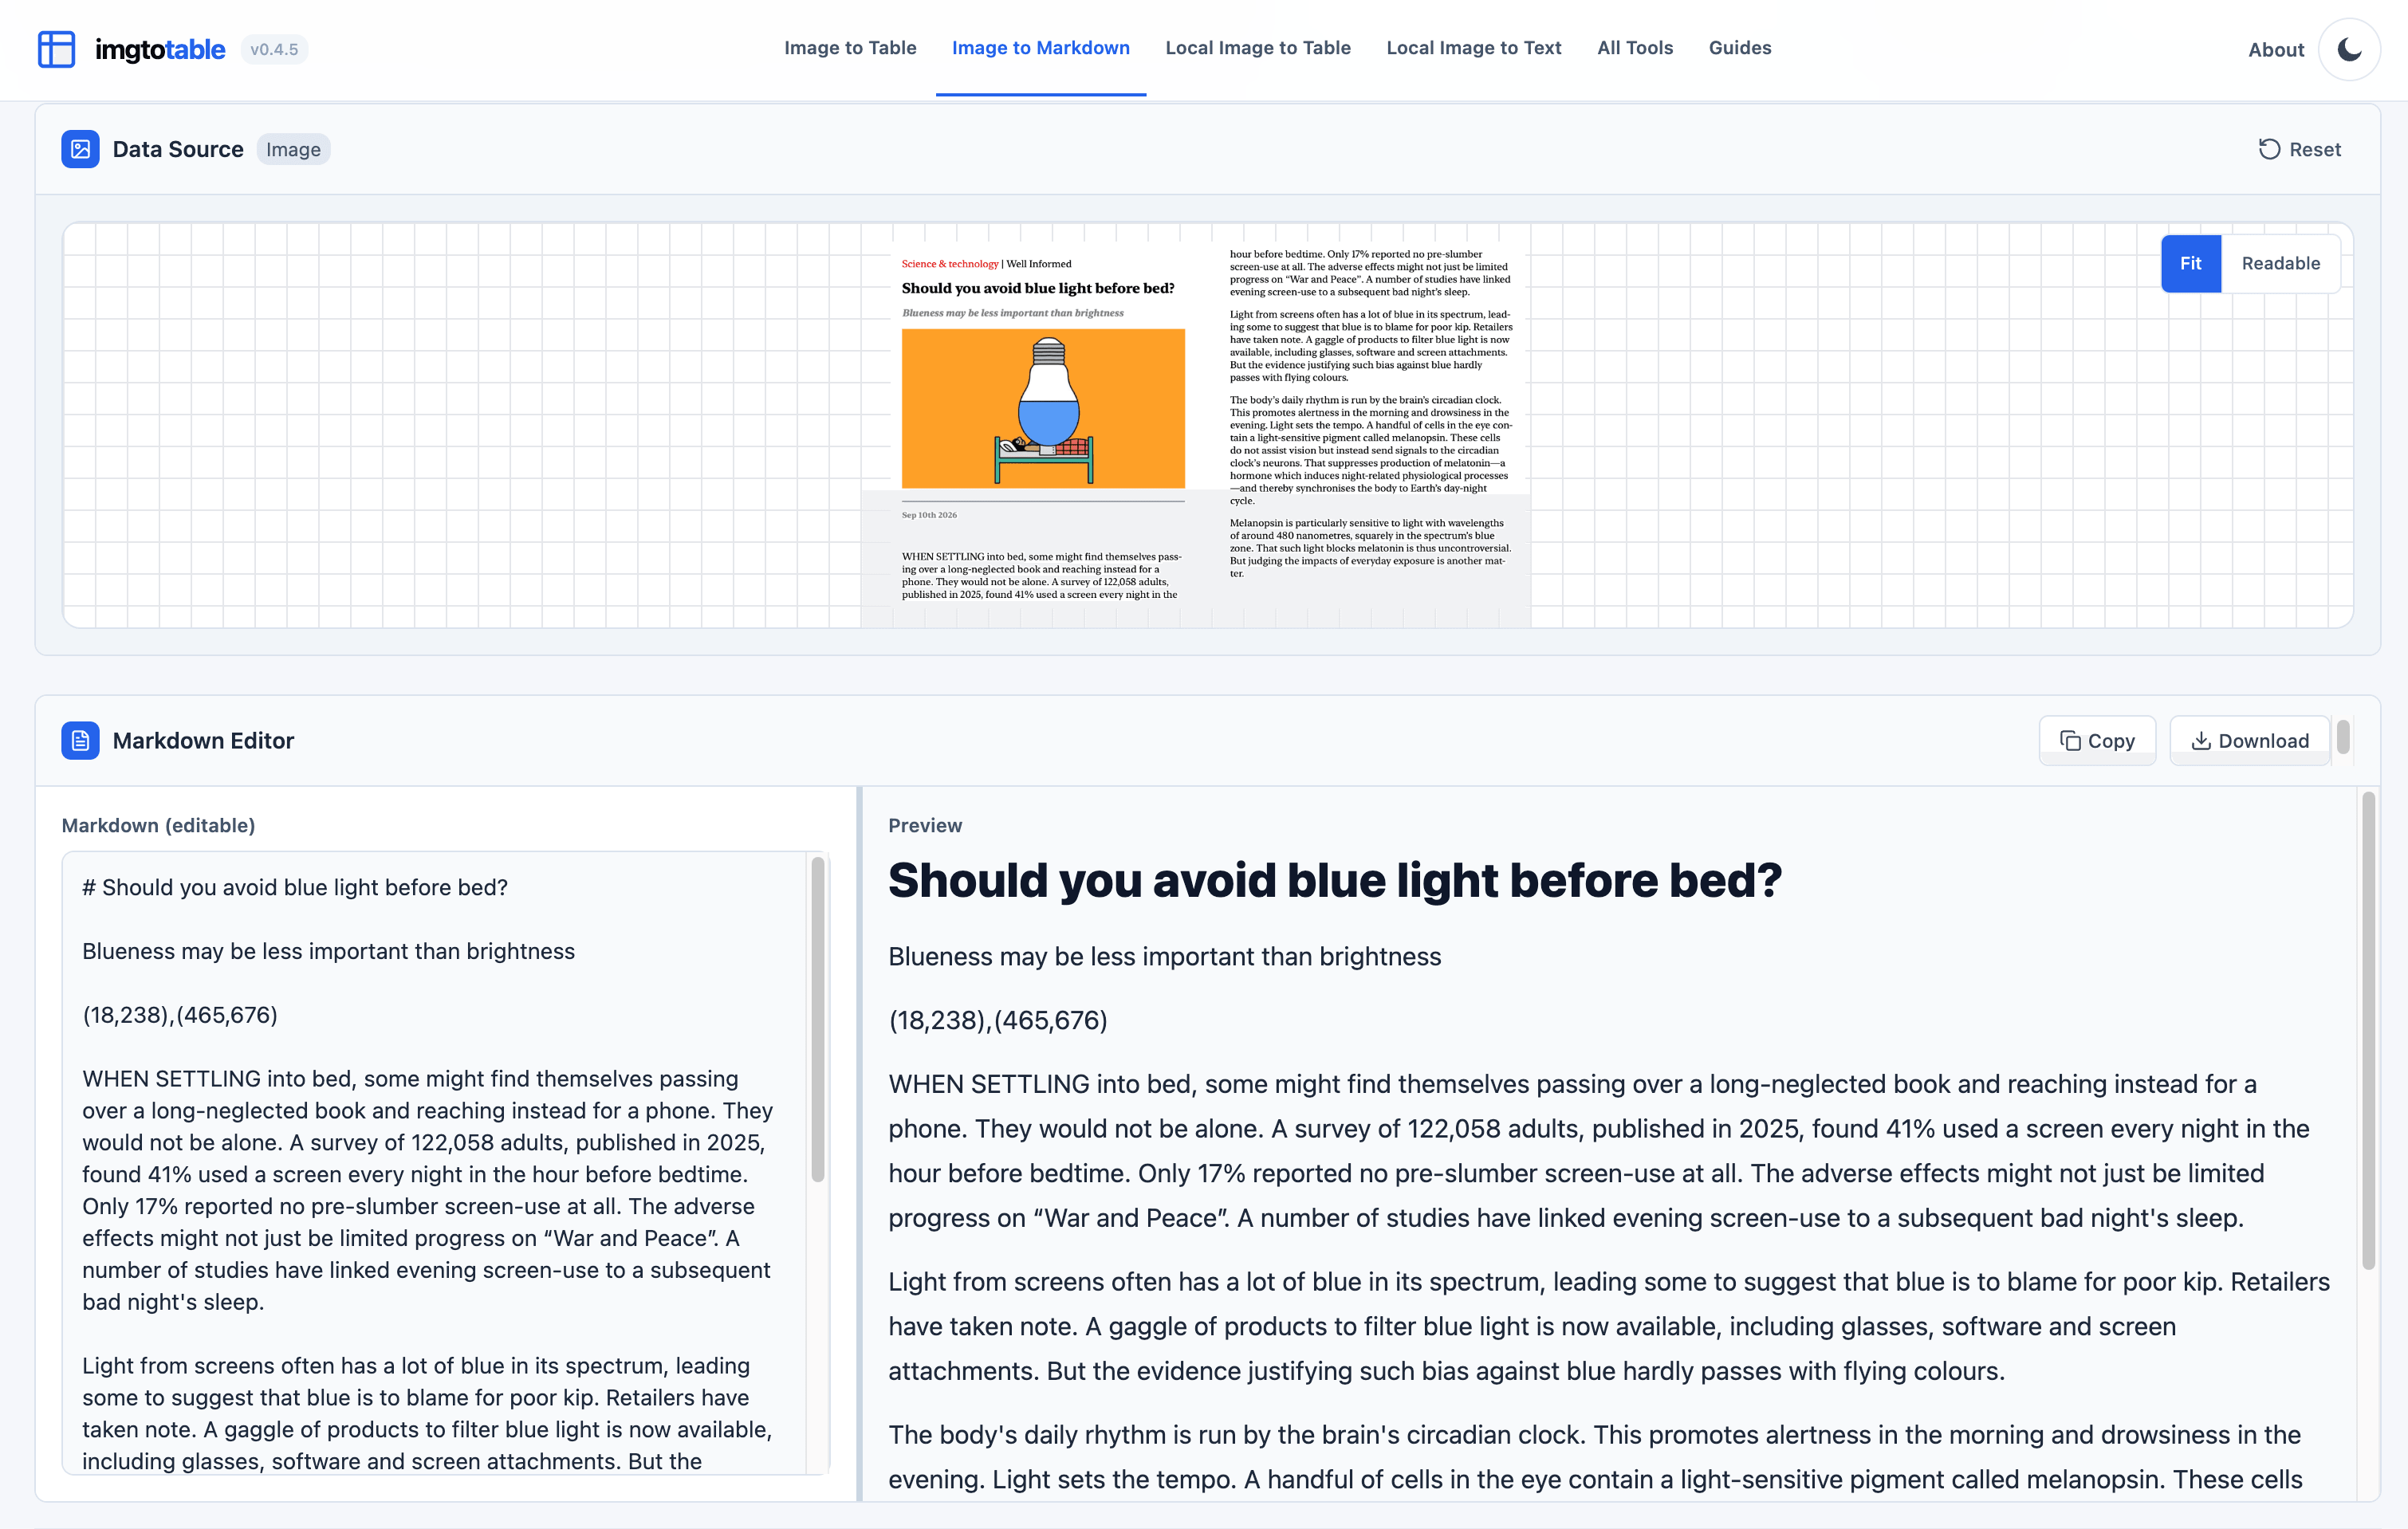
Here the complete image is processed in one pass. The Markdown preview keeps the headline at the top, reads the body down the left column, and then continues from the top of the right column. In particular, it reconnects every night in the with hour before bedtime, preserving the original sentence across the column boundary.
If privacy is your priority, use Local Image to Text: the image stays on your device, although you may need to crop each column and clean up the extracted text manually. If you want more accurate reading order with less manual work, use Image to Markdown, which processes the complete image with a server-side vision model and returns structured Markdown.