Sometimes the usual “upload, convert, download” workflow is not an option. A screenshot may contain client pricing, patient information, internal financial figures, or another kind of data that should not be sent to a recognition API. Retyping the table avoids the upload, but it also creates plenty of opportunities for missed rows and incorrect numbers.
Local Image to Table offers a middle ground. It reads the image in your browser, runs OCR and table-structure recognition on your device, and lets you correct the result before exporting it. The application does not send the selected image to its recognition servers.
How Browser-Local Processing Works
“Browser-local” describes where recognition takes place. It does not mean the page never uses the network: the browser still has to download the site code, model files, and runtime assets when they are not already cached.
-
Local recognition: Local Image to Table downloads PP-OCRv6 text models and a SLANet+ table-structure model, then runs them in browser memory. Those files are downloaded to the device; the selected table image is not included in the requests.
-
Cloud recognition: AI Image to Table sends the image to a server-side vision model. This option is often better at difficult layouts, skewed photos, and multi-level tables, but it may be unsuitable when a document cannot be uploaded.
The tool may continue to work offline after the page, models, and runtime files have been cached. Do not assume the cache is permanent, though. A private-browsing session, cleared site data, or browser storage eviction can require another download. If offline use matters, test it before you need it.
Step 1: Prepare a Sharp Source Image
Local OCR cannot recover detail that is missing from the source. A little preparation is usually quicker than repairing a badly reconstructed table later.
- Keep the whole table visible. Crop away the desktop, desk surface, and browser controls, but leave a small margin around the outside border.
- Flatten photographed pages. Curved paper, glare, and phone shadows can hide cell boundaries or punctuation. Use even light and hold the camera parallel to the page.
- Do not cut off the headers. The header row makes it easier to understand—and later verify—which values belong in each column.
The sample below is a useful test because it is not a simple boxed grid. It has a title spanning several columns, no vertical rules, and a mix of dollar amounts, percentages, dashes, and text labels. All of those details need to survive the conversion.
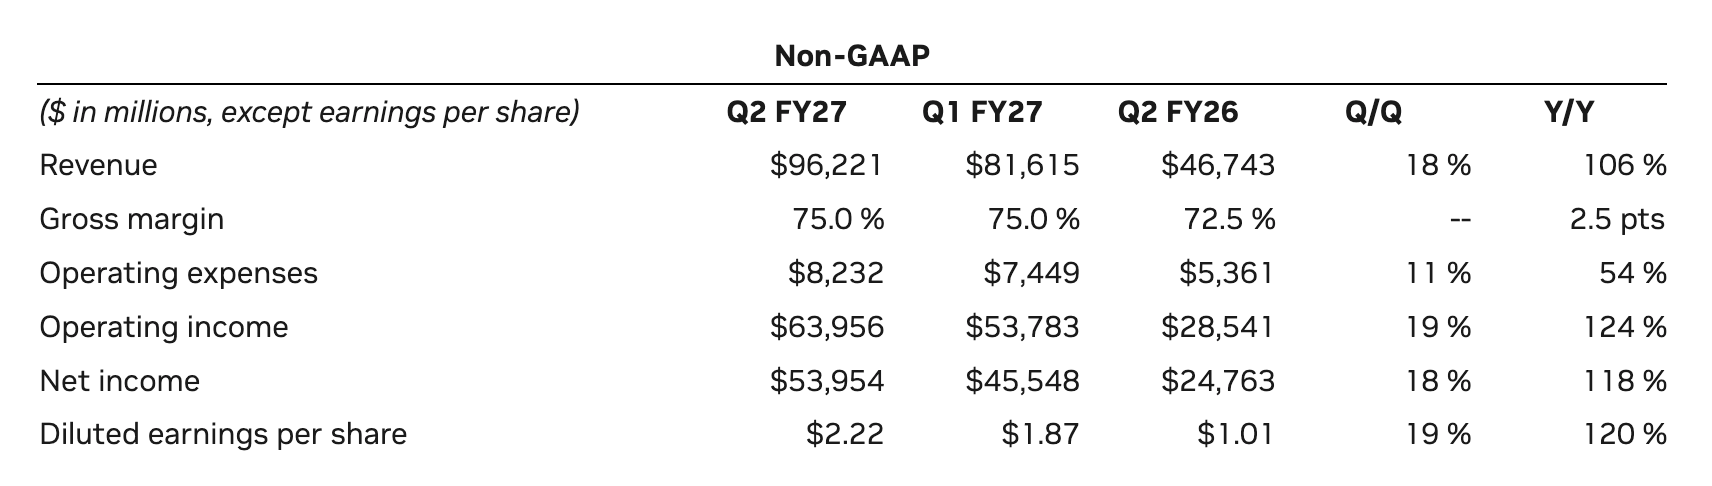
Example source image: a six-row financial table with grouped headings and mixed number formats.
Step 2: Extract Your Table Locally in Browser
- Open Local Image to Table.
- Choose a BMP, GIF, JPG, PNG, or TIFF image up to 10 MB.
- Wait for the model files to load. The first run is normally slower because the browser has to download them.
- Review the editable table. The tool detects text, predicts the table structure, and matches the recognized text to cells.
In this example, the local tool keeps the source image above the reconstructed grid, so the two can be compared without switching tabs. It identifies the merged Non-GAAP heading, the quarter columns, and the six data rows. The result remains editable: if a label is clipped by the current column width or a character was read incorrectly, select the cell and correct it before export.
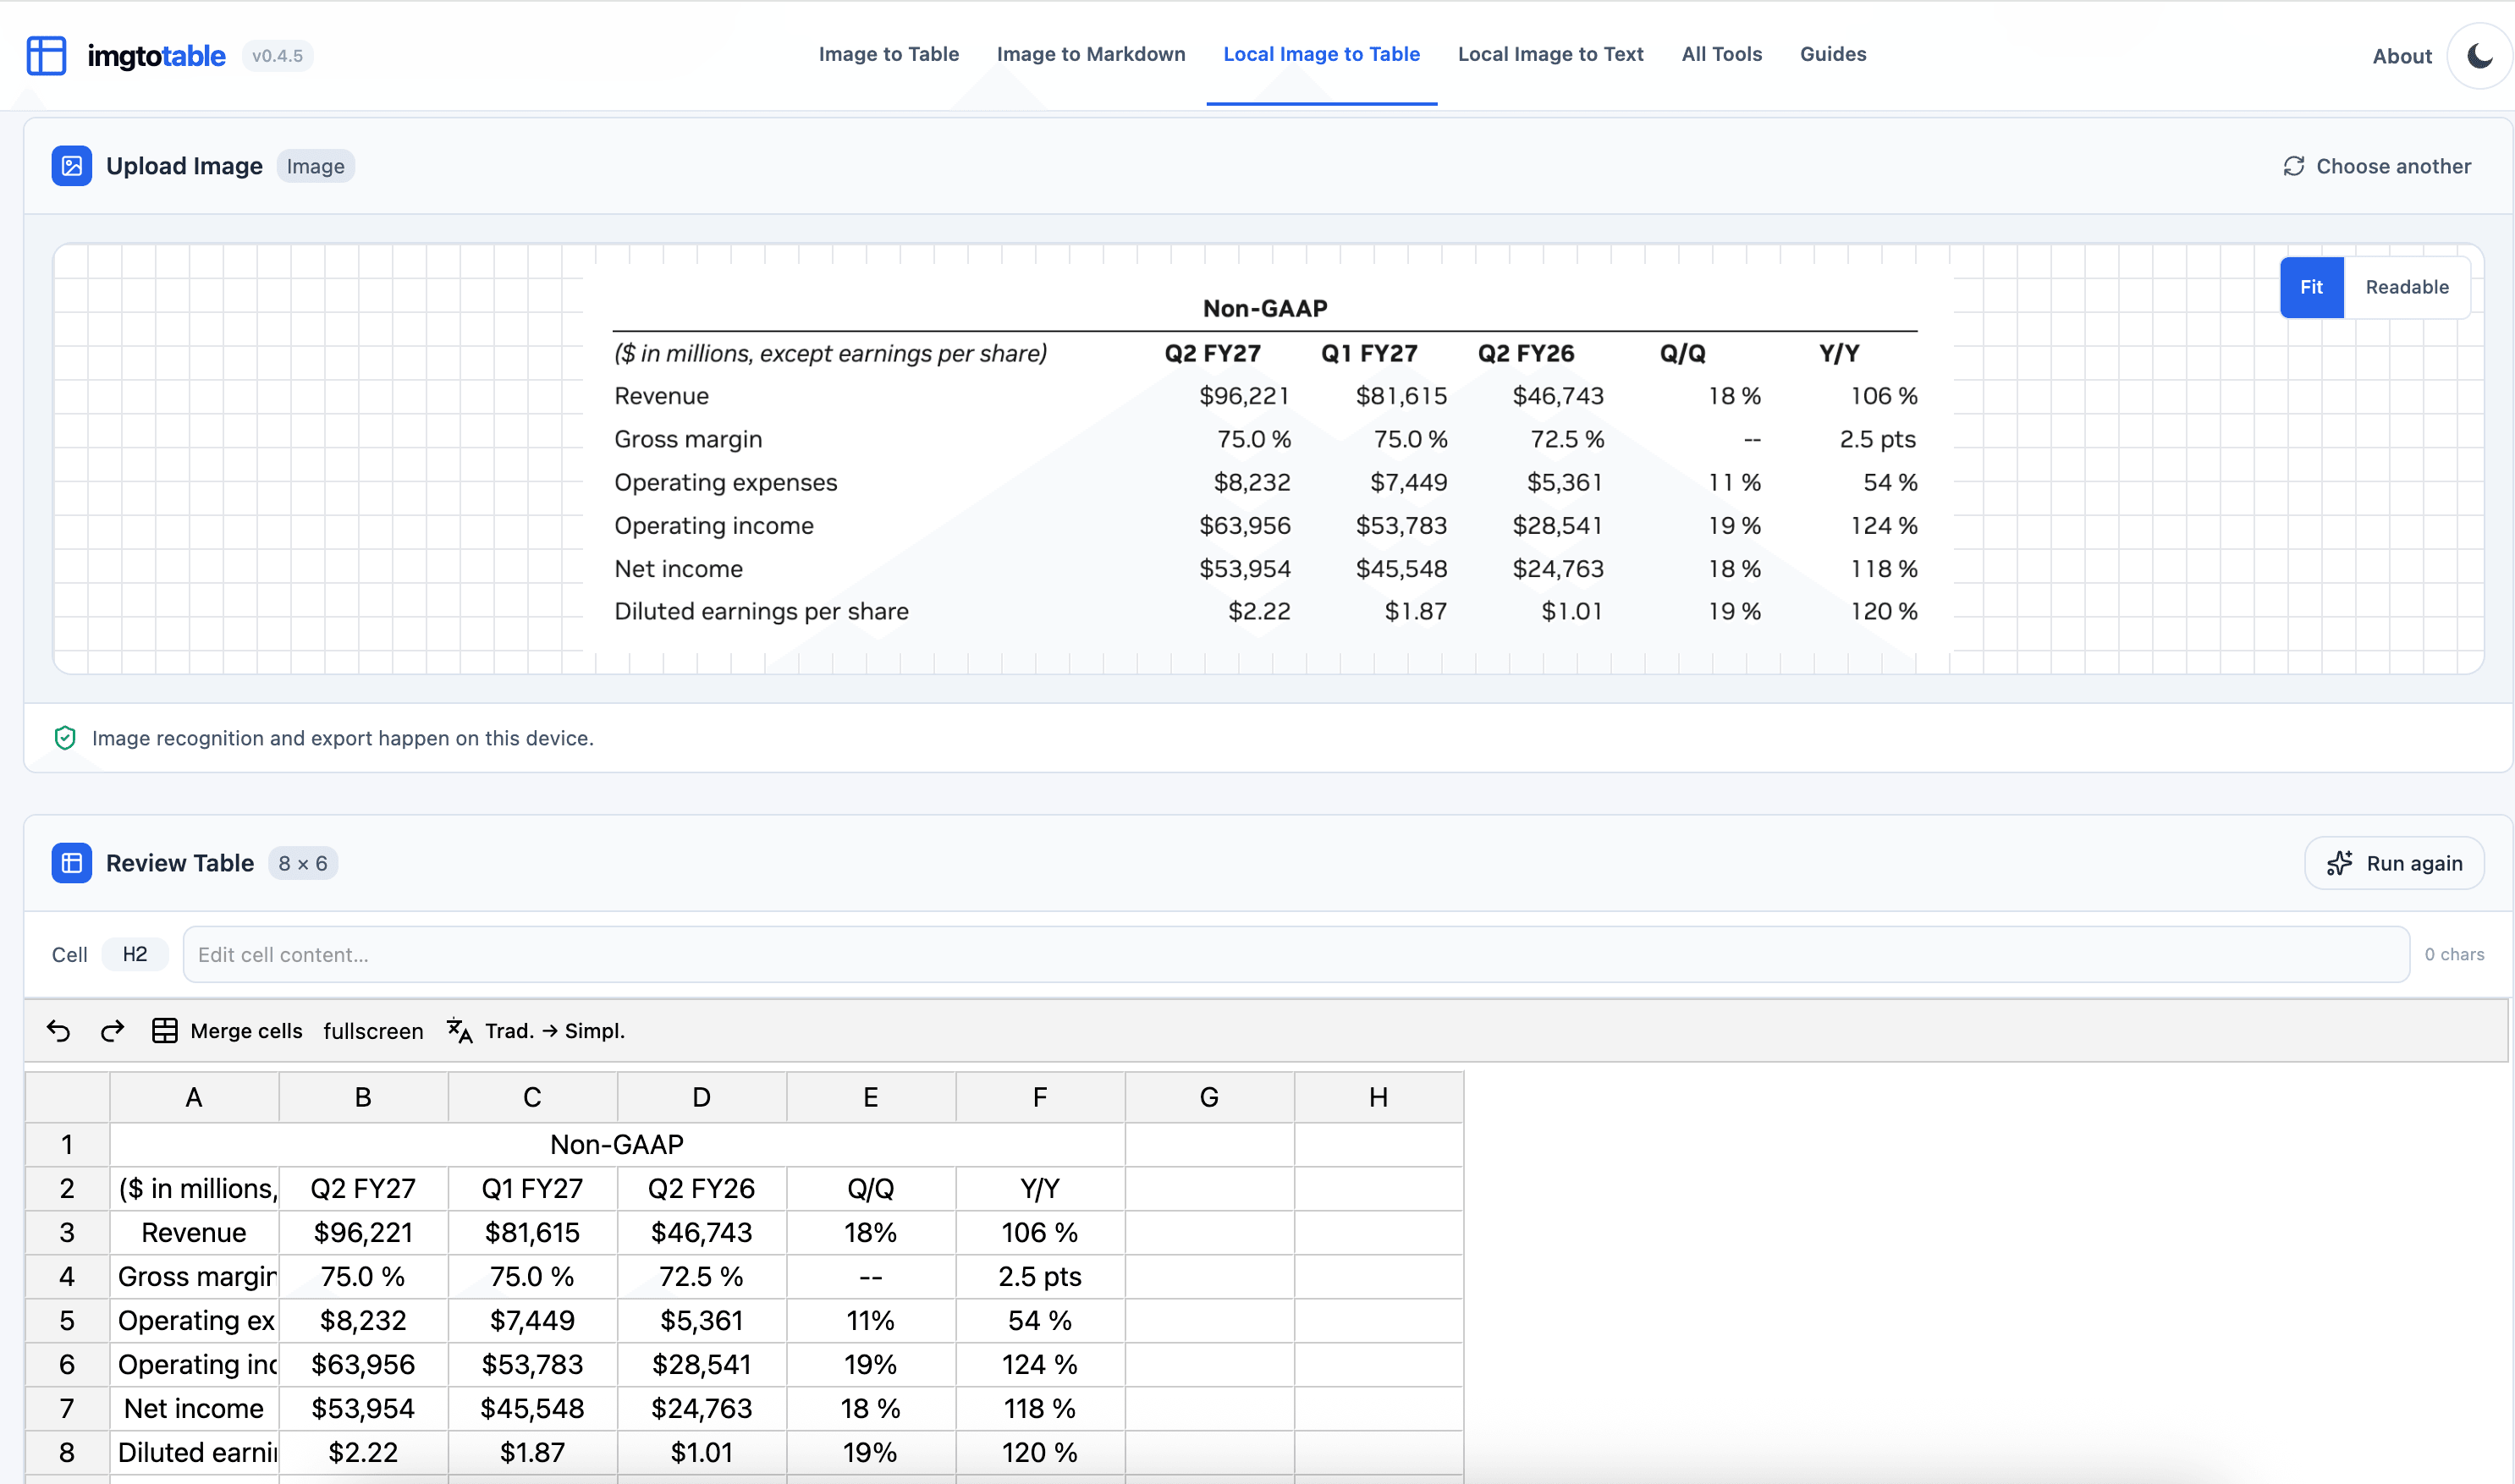
Recognition result in the browser, with the original image available for side-by-side checking.
Step 3: Verify Table Structure and Cells
Treat OCR output as a draft, especially when the table will feed a report, invoice, or calculation. The preview is editable, so this is the best time to fix a mistake.
Check the shape of the table
Compare the number of rows and columns with the source. Look for a missing row near the bottom, two source columns combined into one, or an empty cell that caused the remaining values to shift.
Check the characters that matter
Names and long descriptions are easy to notice when they look wrong. Small numeric differences are not. Compare totals, dates, decimal points, minus signs, and leading zeros such as 00812 with the image.
Check merged and grouped headers
A heading such as Q1 2026 Sales may span separate Units and Revenue columns. Make sure the extracted header structure still makes that relationship clear. If the cells were merged incorrectly, adjust them manually in the table editor: undo the incorrect merge, select the cells that belong under the shared heading, and merge them again before exporting.
Step 4: Export to Excel, CSV, or Markdown
After correcting the preview, choose the format that matches the next job:
- Excel (.xlsx) keeps the grid in a workbook and is the natural choice for formulas, sorting, and further editing.
- CSV is convenient for imports, scripts, and systems that expect plain tabular data.
- Markdown works well for notes, documentation, and repositories.
The export panel also supports JSON, HTML, LaTeX, XML, ASCII, MediaWiki, and YAML.
If recognition is slow or the result looks wrong
- The first run appears to pause: The model files are probably still downloading and initializing. Later runs can reuse cached copies, although cache behavior varies by browser.
- A large photo takes too long: Crop unused areas and resize an oversized camera image. More pixels require more memory and processing time but do not help once the text is already clear.
- Columns are merged or shifted: Straighten the image and leave the full outer boundary visible. If the layout is unusually complex, try the server-based AI Image to Table tool only if the document is suitable for upload.
- The tool needs the network again: The browser may have cleared or evicted its cached model files. Let them download again before retrying offline.